As more devices connect to a network, streaming and processing their generated data becomes a challenge. This challenge becomes acute when we need low-latency querying, aggregation, and stateful computation.
The Hazelcast Cloud computation and storage platform supports the in-memory computing that many high-volume Internet of things (IoT) applications require. Hazelcast also provides Jet, enabling Java for data transformation.
More specifically, you can create custom batch processing jobs and submit them to the Hazelcast Cloud cluster to process data from custom streams. You don’t even need to write the integration code yourself. Hazelcast provides several connectors, enabling you to quickly integrate your batch jobs with various systems.
PurpleAir is one data-intensive IoT example. Everyone contributes to a network of connected sensors to enhance air quality monitoring. Monitoring the air quality index (AQI) is essential for people living in metropolitan areas. If the AQI is above the safety threshold, people can choose to stay indoors.
This article demonstrates how to use Hazelcast Cloud to process AQI data. We’ll retrieve this data from PurpleAir and store it in an AWS S3 bucket using an AWS Lambda function. The AWS Lambda function writes the processed data to a list in the Hazelcast Cloud cluster, and another AWS Lambda function acts as an API to retrieve it.
Retrieving AQI Data with an AWS Lambda Function
Use the AirNow API to retrieve the AQI data. Sign up for a free API key to do so. Then, use their Query Tool for the Observations by Monitoring Site web service. The Query Tool enables you to quickly generate the HTTP request URL for retrieving AQI data based on your specific geographic bounding box.
The request URL looks like this:
https://www.airnowapi.org/aq/data/?startDate=2022-03-07T16&endDate=2022-03-07T17&parameters=PM25&BBOX=-124.205070,28.716781,-75.337882,45.419415&dataType=A&format=application/json&verbose=0&monitorType=0&includerawconcentrations=0&API_KEY=
Here’s a sample response from this API:
					{"Latitude":41.875556,"Longitude":-103.658056,"UTC":"2022-03-07T16:00","Parameter":"PM2.5","Unit":"UG/M3","AQI":7,"Category":1},
{"Latitude":36.1589,"Longitude":-98.9353,"UTC":"2022-03-07T16:00","Parameter":"PM2.5","Unit":"UG/M3","AQI":15,"Category":1},
{"Latitude":34.632999,"Longitude":-98.428802,"UTC":"2022-03-07T16:00","Parameter":"PM2.5","Unit":"UG/M3","AQI":19,"Category":1}
After testing the API, create an S3 bucket with the name aqi-bucket-82. Use the AWS Management Console or the AWS CLI (aws s3 mb command) to create the bucket.
The next step is to create the AWS Lambda function for the Node.js 14.x runtime with default permissions. You can use the Author from scratch option in the Management Console, and default Lambda permissions, so that the function can output logs to Amazon CloudWatch Logs. The Node.js runtime enables you to use the web-based code editor on the AWS Lambda console. Consequently, you can implement Lambda functions without installing any additional tools.
After creating the function, use the code editor on the AWS Lambda console to implement the helper function, getAQIData, as the screenshot below shows.
Here’s the complete code:
					const https = require('https');

function getAQIData() {
  // Request URL
  const url = ';

  return new Promise((resolve, reject) => {
    const req = https.get(url, res => {
      let rawData = '';

      res.on('data', chunk => {
        rawData += chunk;
      });

      res.on('end', () => {
        try {
          resolve(JSON.parse(rawData));
        } catch (err) {
          reject(new Error(err));
        }
      });
    });

    req.on('error', err => {
      reject(new Error(err));
    });
  });
}

The function makes the call to the AirNow API and returns the JSON-formatted data with your AQI. Each entry in the resulting data contains the geolocation, timestamp, unit, and value.
Here, you’ll extract only the AQI values in your AWS Lambda function handler. Then, upload the resulting array to the aqi.txt file in your bucket:
					exports.handler = async event => {
  // Send request
  const response = await getAQIData();

  // Get AQI only
  var aqiData = [];
  for (var item in response) {
    aqiData.push(response[item].AQI);
  }

  // Debug AQI values
  console.log(aqiData);

  // Upload to S3
  var params = {
    Bucket: 'aqi-bucket-82',
    Key: 'aqi.txt',
    Body: aqiData.join('\n'),
  };

  S3.putObject(params).promise()
    .then(res => {
    console.log(`Upload succeeded - `, res);
  })
  .catch(err => {
    console.log("Upload failed:", err);
  });
};
Test event (it can be an empty JSON), you should get the following result: 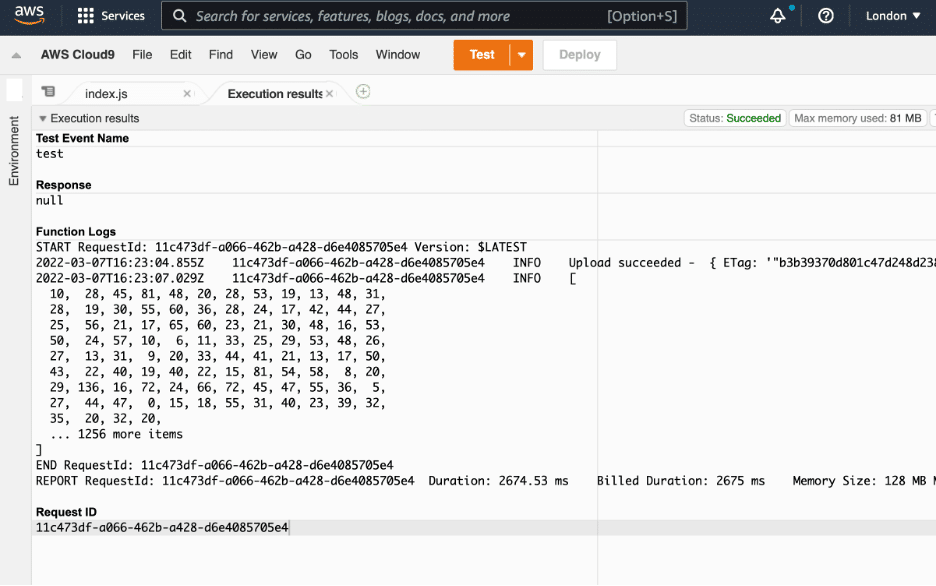
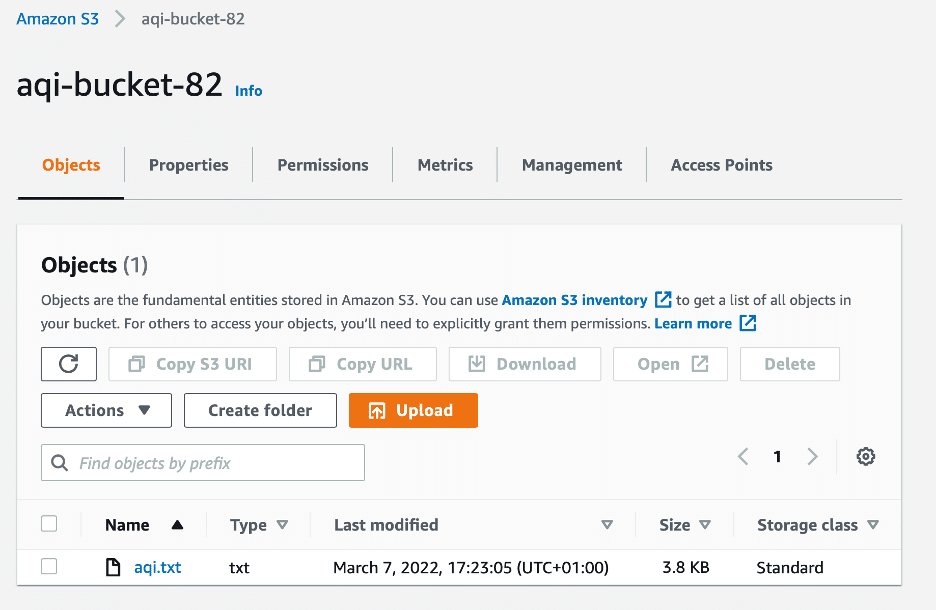
Also, the bucket should now contain the aqi.txt file, like in the screenshot below:
Creating a Hazelcast Jet Pipeline
After pushing AQI data to the S3 bucket, you can create the pipeline. The pipeline reads AQI data from the aqi.txt in the S3 bucket. Then, the pipeline filters out AQI values that are below the threshold and pushes them to the list in the Hazelcast Cloud cluster. To implement this action, create a Java Maven project with dependencies. Alternatively, you can use the project template that the Hazelcast Cloud provides (under Connect your cluster). Remember, though, that you need to add the dependencies tocom.hazelcast.jet and aws-java-sdk-s3.
					<dependencies>
    <dependency>
        <groupId>com.hazelcast</groupId>
        <artifactId>hazelcast-enterprise</artifactId>
        <version>5.0</version>
    </dependency>
    <dependency>
        <groupId>com.hazelcast.jet</groupId>
        <artifactId>hazelcast-jet-s3</artifactId>
        <version>5.0</version>
    </dependency>
    <dependency>
        <groupId>com.amazonaws</groupId>
        <artifactId>aws-java-sdk-s3</artifactId>
        <version>1.12.172</version>
    </dependency>
</dependencies>
Next, implement the main method in Client.java. First, connect to the cluster:
					// Client config
ClientConfig config = new ClientConfig();
config.setProperty(HAZELCAST_CLOUD_DISCOVERY_TOKEN.getName(),
    ");
config.setClusterName("");

// Connect to the cluster
HazelcastInstance client = HazelcastClient.newHazelcastClient(config);
aqi-bucket-82. Each line of this file converts to a float and the pipeline rejects it if the resulting value is lower than the predefined threshold. Finally, the pipeline writes the output values to the output sink, which is the list named anomaly:
					// Set the up pipeline
Pipeline pipeline = Pipeline.create();

// Get data from S3 and filter out data below the threshold
final float threshold = 40;

pipeline
    .readFrom(S3Sources.s3(Collections.singletonList("aqi-bucket-82"),
        "aqi.txt",
        StandardCharsets.UTF_8,
        () -> S3Client.create(),
        (filename, line) -> line))
    .filter(item -> Float.parseFloat(item) > threshold)
Afterward, submit the job to the cluster. Note that you need to send the classes and the package, as the pipeline doesn’t automatically send them to the cluster.
					// Submit job
client.getJet().newJob(pipeline, new JobConfig()
    .addPackage("com.hazelcast.cloud")
    .addClass(Client.class)
    .addClass(S3Client.class)
    .addClass(SdkClient.class)
    .addClass(SdkAutoCloseable.class));
}
Creating a Lambda Function to Act as an API
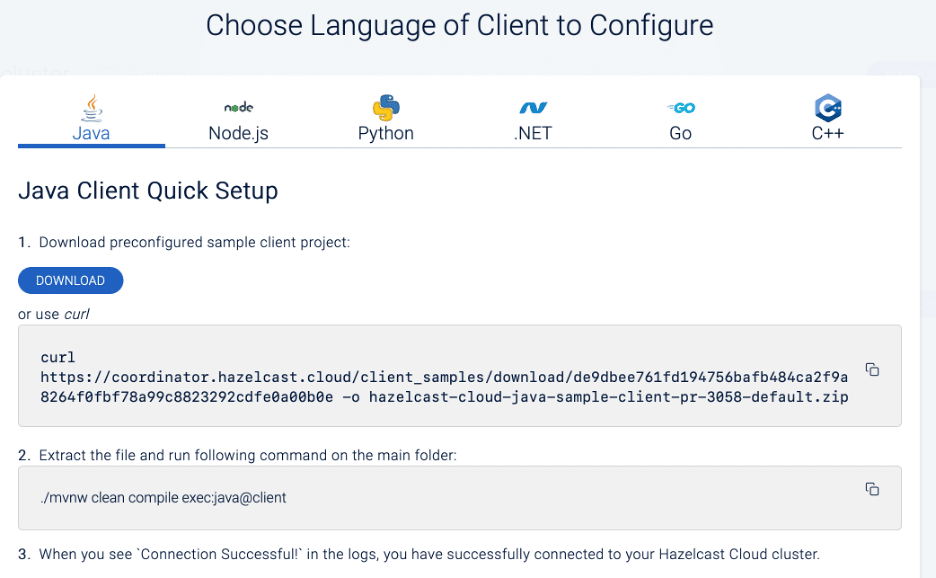
You can use the same approach as above to connect to the Hazelcast Cloud using the AWS Lambda function. For this AWS Lambda function, you use the Node.js runtime again. Also, you can use the corresponding client code template for Node.js rather than for Java. The template contains several code examples showing how to connect to the cluster and work with maps and SQL. Here, you only need to connect to the cluster and access the list named anomaly. You can do this using thenewHazelCastClient function of the Client object from the hazelcast-client Node.js package.
					'use strict'
const { Client } = require('hazelcast-client');

function createClientConfig() {
    return {
        network: {
            hazelcastCloud: {
                discoveryToken: ''
            }
        },
        clusterName: ',
        properties: {
            'hazelcast.client.statistics.enabled': true,
            'hazelcast.client.statistics.period.seconds': 1,
        }
    };
}

exports.handler = async (event) => {
    const client = await Client.newHazelcastClient(createClientConfig());
    const list = await client.getList('anomaly');

    console.log("Connection successful");

    const itemCount = await list.size();

    const response = {
        statusCode: 200,
        body: JSON.stringify({"itemCount": itemCount}),
    };

    return response;
};
In the code above, the Client.newHazelcastClient function accepts one parameter, representing the client configuration. This configuration is an anonymous object containing the cluster name, network information (with the cluster discovery token), and additional properties.
After a successful connection, the newHazelCastClient function returns an object, which you use to get a reference to the anomaly list. Here, you only retrieve the number of items in this list and return it to the caller. However, you could implement additional logic to process the items before returning them.
Note that the hazelcast-client Node.js package isn’t available in AWS Lambda by default. There are two ways to solve this challenge: you can use AWS Lambda layers or develop the AWS Lambda function locally and upload it with all dependencies as a single ZIP file. For this tutorial, use AWS Lambda layers and proceed as follows.
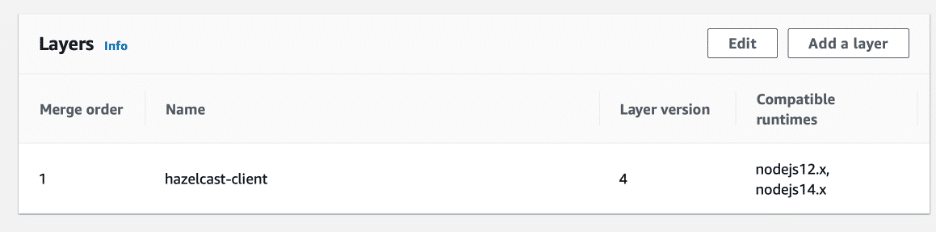
First, using npm, download the hazelcast-client and its dependencies to the local nodejs/node_modules folder. Then, compress the entire nodejs folder and upload the resulting ZIP file to the AWS Lambda Console as a new layer. When uploading the ZIP file, select Node.js 12.x and Node.js 14.x as compatible runtimes. Afterward, add the new layer in the AWS Lambda function’s Code/Layers section.
The new layer enables it to execute the AWS Lambda with dependencies to the Hazelcast client. The output should look like this:
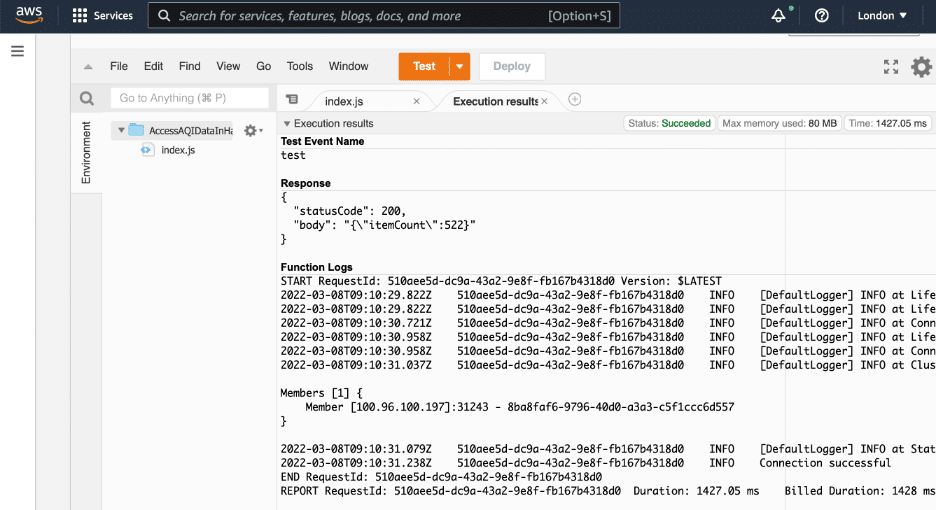
You can also call the AWS Lambda function using an HTTP request after adding the API gateway trigger.
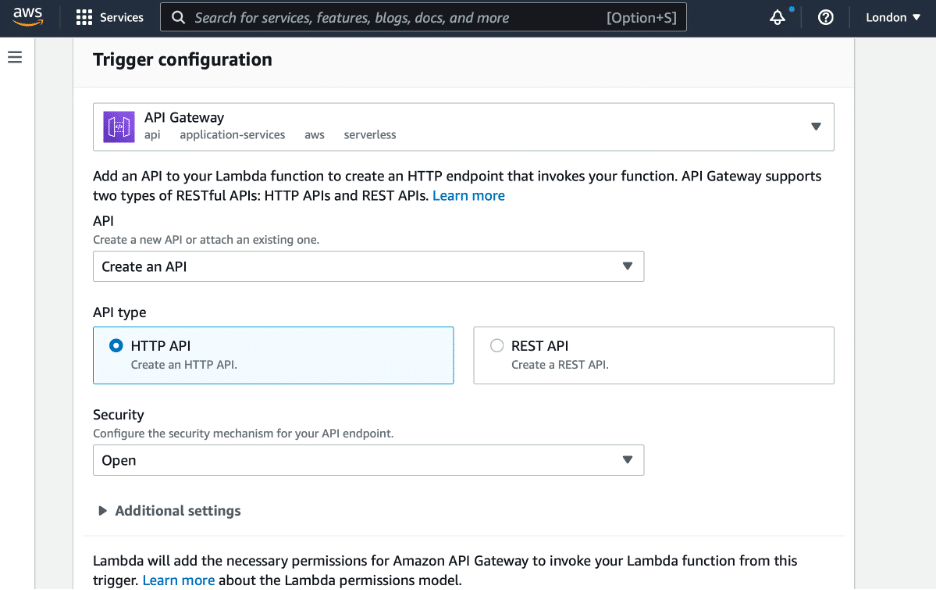
GET request to the created API, you obtain the number of AQI readings above the threshold. 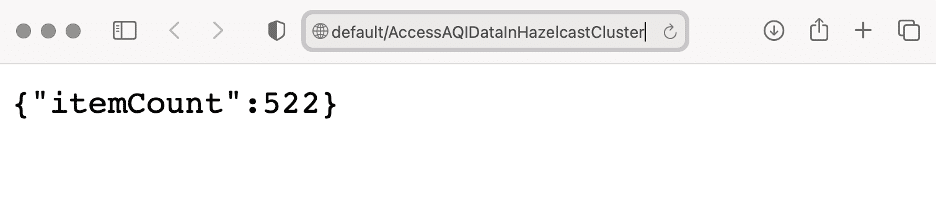
You could provide this information in an application or via an alert to let users know that many devices have recorded the AQI as high in their area. They can then use this knowledge to make decisions about their health risks and plan their activities for the day.
Summary
This article demonstrated how to retrieve and process AQI data using a Hazelcast cluster, a Java client application, and an AWS Lambda function. You can connect your applications to the Hazelcast cluster using various technologies, and the code for connecting to the cluster looks the same for every technology.
Additionally, Hazelcast provides several connectors enabling you to read and write from and to various endpoints, including AWS S3. All this allows you to build comprehensive data streaming and processing solutions rapidly.
To explore Hazelcast Cloud’s full range of benefits, try it for yourself.
If you’re interested in developing expert technical content that performs, let’s have a conversation today.