Search

Add TomTom Maps to a Website in 30 Seconds

Adding a Map to Your Web App

With TomTom’s Maps SDK for Web, adding a map to a web page has never been easier. All that’s required is a basic HTML document, the SDK itself, and a few simple lines of JavaScript code.

In this article, we’ll quickly show you how to do the following:

  • Register for a developer account.
  • Obtain an API key so you can use the SDK.
  • Create a simple application that displays a map centered at a hardcoded latitude and longitude.
  • Make a small change to the application to find the latitude and longitude for a desired location.

You’ll find the full source for both versions of the application at https://github.com/josejoserojas/AMapIn30Seconds.

Getting the API Key

In order to use the SDK, you need to obtain a developer account and an API key. The API key is free and authenticates you with TomTom so you can use all of the great features available in the SDK.

If you haven’t already registered for a TomTom account, visit https://developer.tomtom.com/user/register. There you’ll find a very short form, similar to the one below, that requests only basic information.

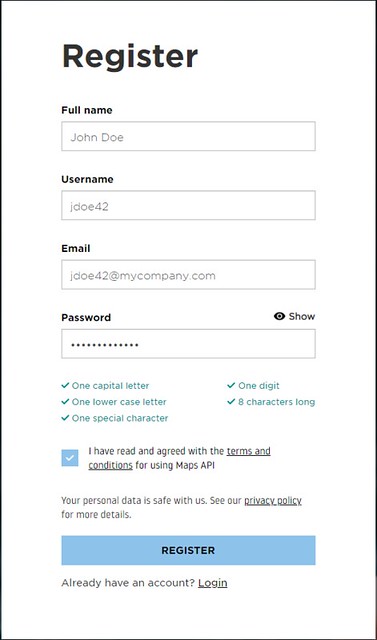
When you click the “Register” button, you’ll be asked to solve a “captcha” to prove you’re human. After this, you’ll receive an email that allows you to activate your account. When you click the “Activate Account” button in that email, you’ll be brought back to a page like this:

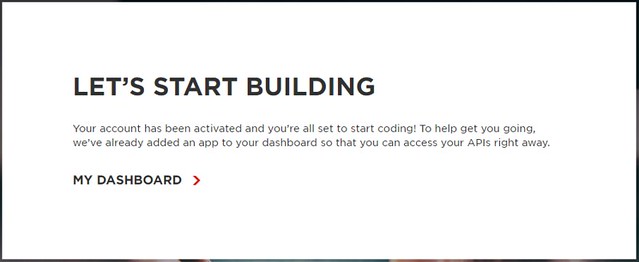
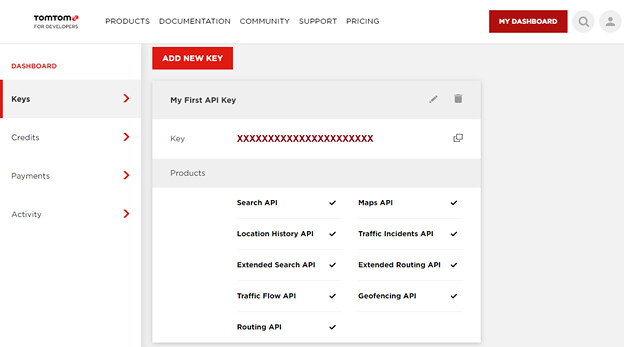
Click on “My Dashboard” to see the dashboard for your account, where you’ll find your first API Key. This is the key you’ll include in your application so you can use the SDK.

The Web Page

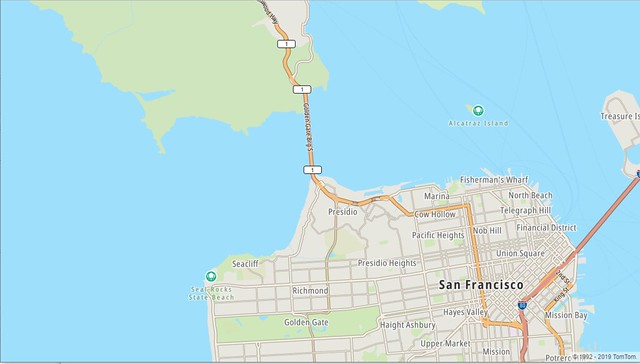
We’ll start with a simple web page that displays a map of the Golden Gate Bridge in San Francisco. At first, to keep things easy, we’ll hardcode the latitude (37.80776) and longitude (-122.47483) for this location.

Referencing the SDK

To use the SDK, we must first include a reference to it. TomTom offers three distribution channels:

  • Content Distribution Network (CDN)—the SDK is hosted on TomTom’s CDN.
  • Node.js Package Manager (NPM)—the SDK is hosted locally following installation by the Node.js package manager.
  • ZIP Files—the SDK is first downloaded, and unzipped, then locally hosted copies of these files are referenced in the application.

The most straightforward approach is to use TomTom’s CDN, which is as simple as adding a few lines of code to the HEAD element of our HTML. That’s what we’ll use in our application.

To include the CSS styling and the JavaScript necessary to display maps, add the following lines:

				
					<link rel="stylesheet" type="text/css" href="https://api.tomtom.com/maps-sdk-for-web/cdn/5.x/5.41.0/maps/maps.css">

<script src="https://api.tomtom.com/maps-sdk-for-web/cdn/5.x/5.41.0/maps/maps-web.min.js"></script>


The SDK also includes services like the fuzzy search service, which allows us to search for information about a location (such as “Golden Gate Bridge”). To include the JavaScript necessary for these services, add the following:

				
					<script src="https://api.tomtom.com/maps-sdk-for-web/cdn/5.x/5.41.0/services/services-web.min.js"></script>


Notice that the URLs in these lines reference a specific version of the SDK(v.5.41.0). To find the URLs for the latest version, as well as information for other distribution options, visit https://developer.tomtom.com/maps-sdk-web-js/downloads.

Once you’ve added the JavaScript, a global object named “tt” (TomTom) becomes available. You then reference map functions and objects via the “tt.map” namespace, and service functions and objects via the “tt.service” namespace.

Placing the Map

If we want to display a map, we need to set aside some space on our web page where the map will go. The easiest way to do this is to add a DIV element into the BODY of the HTML:

				
					<div id="map-div"></div>


Notice that we include an identity (map-div) for the division to make it easy to reference later.

We also want to size the division so there’s room to display the map. In this case, we’ll make the map covers 100% of the web page. We can accomplish this by adding the following CSS styling to the HEAD element of the HTML:

				
					<style>
  body, html { margin: 0; padding: 0; }
  #map-div { width: 100vw; height: 100vh; }
</style>


The Code

Now that we’ve included the SDK and set aside a place to display our map, there’s only one step left: We need to add a little bit of JavaScript code to actually use the SDK.

Since this is a simple application, we’ll include the code in-line, inside a SCRIPT element, within the BODY element of our HTML. If the application were to become more complex, we’d want to move this code in its own separate JavaScript file.

Identifying the Application

We’ll start by setting the product information for our application. While this isn’t strictly required, it allows TomTom to gather usage statistics for the application.

				
					const API_KEY = 'YOUR_API_KEY';
const APPLICATION_NAME = 'My Application';
const APPLICATION_VERSION = '1.0';
 
tt.setProductInfo(APPLICATION_NAME, APPLICATION_VERSION);


You should edit this information to reflect your own product’s information. Where “YOUR_API_KEY” appears, replace it with the API key you obtained earlier in this article.

Displaying the Map

Next, we’ll create the map, associate it with the DIV element that will contain it, and center/zoom the map to the location we want (the Golden Gate Bridge). For simplicity, we hardcode the latitude and longitude of the location in a constant:

				
					const GOLDEN_GATE_BRIDGE = {lng: -122.47483, lat: 37.80776};
 
var map = tt.map({
  key: API_KEY,
  container: 'map-div',
  center: GOLDEN_GATE_BRIDGE,
  zoom: 12
});


Notice that we choose a zoom level of 12, to display both the bridge and some of the surrounding city of San Francisco. Valid zoom levels range from 0 through 22. Higher zoom levels provide maps with greater detail, but covering a smaller area.

With this code in place, our application to display a map of the Golden Gate Bridge is complete. It’s that easy!

Finding a Location to Display

In the real world, it’s unlikely we’ll know the latitude and longitude of our desired location. A common way of finding this information is to use the fuzzy search service provided by the SDK.

Thankfully, we don’t have to do much to use this service. Changing our previous example is as simple as this:

				
					var map = ...
 
tt.services.fuzzySearch({
  key: API_KEY,
  query: 'Golden Gate Bridge'
})
.go()
.then(function(response) {
  map = tt.map({
	key: API_KEY,
	container: 'map-div',
	center: response.results[0].position,
	zoom: 12
  });
});


Most of the services in the SDK, including fuzzy search, execute asynchronously. They generally return a JavaScript Promise.

To wait for the search to complete, we use the JavaScript Promise’s “then” function. There, we pass an anonymous callback function that displays a map of a location from the search results. In this callback function, we use code similar to what was presented earlier to display the map.

The search response may include multiple matching results. In our code, we reference the position (latitude/longitude) of the first (and best) matching result. This result is contained in array element zero.

Conclusion

With very little code, we quickly created an application that can be used to display a map of any desired location. With no additional code, the map is also responsive, allowing the user to easily zoom and pan the map.

Using the same SDK, you can easily enhance the application to allow users to search for their own locations, display routes between locations, and add a host of other features.

Looking for another resource to build your map? Then check out our video on how to add your map to your website: Add a map to your website in 30 seconds!

This article was originally posted on TomTom’s blog.

If you’re interested in developing expert technical content that performs, let’s have a conversation today.

Facebook
Twitter
LinkedIn
Reddit
Email

POST INFORMATION

If you work in a tech space and aren’t sure if we cover you, hit the button below to get in touch with us. Tell us a little about your content goals or your project, and we’ll reach back within 2 business days. 

Share via
Copy link
Powered by Social Snap